Using Amateur Contact Log by N3FJP for POTA

Original author: W0ZAP
Table of Contents

Amateur Contact Log by N3FJP has many useful features and functions. Not the least of which is that it provides both logging and rig control in one package. I found it to be a perfect companion for POTA logging purposes both on-site and in the transfer of handwritten logs.
I rearranged my visible fields and the sequence of completion as shown in Figure 1.
Note: These instructions apply to the ACLog display area at the BOTTOM of the display used for data entry. The fields at the TOP of the display listing all the entered QSO’s can be easily re-arranged into a default view by simply dragging the headers from back and forth across the top to arrange the view as you see fit.
 Figure 1
First step is to click on Settings > Other Field Titles and Fill Behavior.
Here is where you use the available OTHER fields to add YOUR park ADIF IDs (MY_SIG) and (MY_SIG_INFO) then use two additional OTHER fields to add Park to Park ADIF IDs (SIG) and (SIG_INFO). Remember which “other” fields you used. In your next step you will only see “Other”, “Other2”, “Other3”, etc. so remember which “Other” fields you used. Figure 2 shows my setup and configuration in this menu.
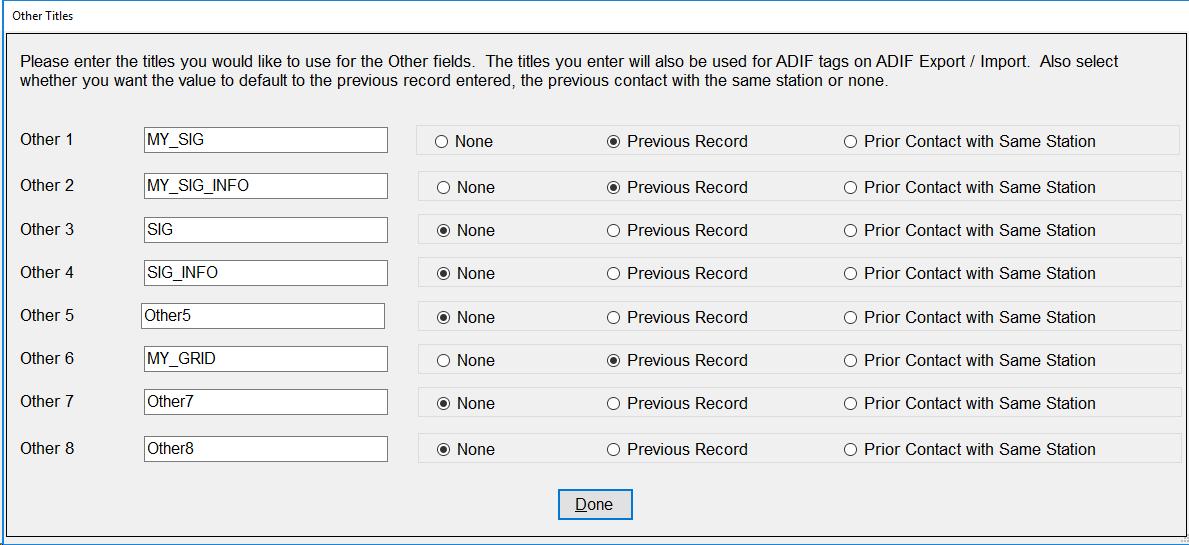 Figure 2
After you have completed that part of the setup we move on to rearranging our screen display. Click on Settings > Edit Fields Displayed, Position and Tab Order.
Here is where you decide how you want to operate to save you the maximum time logging and spend the most time calling. In Figure 3 you will find the display organization that I use.
 Figure 3
You may want to refer to this as we move through our next process. Your screen display (Settings > Edit Fields Displayed, Position and Tab Order) should look like that in Figure 4. NOTE: This is customized to show the display in Figure 3 so some things may be moved around a bit.
The first thing you will want to do is study your screen and decide what you really want/need to see on the display at the bottom (Figure 3). Then decide on what sequence works for you.
With things such as Date set to repeat from previous contact (Settings > Date Options) using the sequence above, I type in the call, tab across Time On to set the UTC time of the contact and enter the reports, click the Log Contact button and I am ready for the next QSO. If I am in an iffy cell/internet situation I turn off the call lookup to speed things along (Settings > CallBook). Additionally, you should check the option Settings > Fill Fields When Tabbing from Call. (Figure 5).
When I am home, I simply upload the ADIF file to LOTW/QRZ/eQSL. You may establish another process that better suits your needs. In Figure 4 you see all the preset fields displayed plus other presets you can display and the “other” fields. To show or not show a field, click on the field name, then check (to display) or uncheck (to hide) the Visible on Main Form checkbox. To move fields around the screen in the sequence that you wish to use, check (to enable repositioning) or uncheck (to disable repositioning) the box beside Enable Repositioning All Fields on Main Form
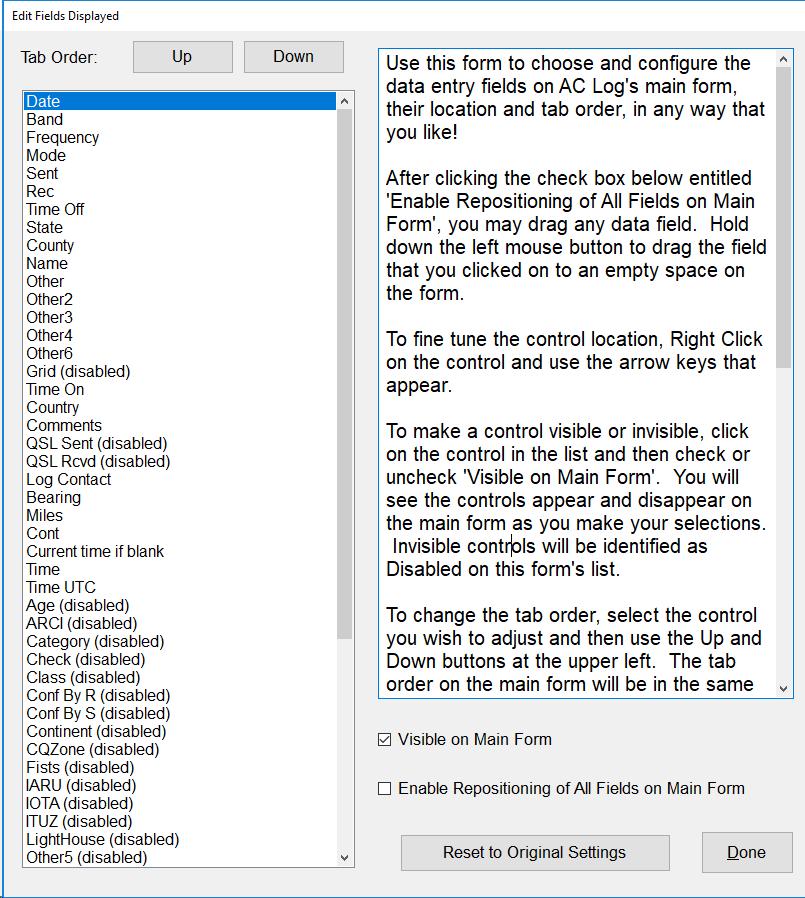 Figure 4
IMPORTANT: PLEASE UNCHECK Enable Repositioning of All Fields on Main Forms before returning leaving this screen. This is an IMPORTANT STEP.
Be sure that you checked the option Settings> Fill Fields When Tabbing from Call in the Settings pulldown at the top of the page. (Figure 5)
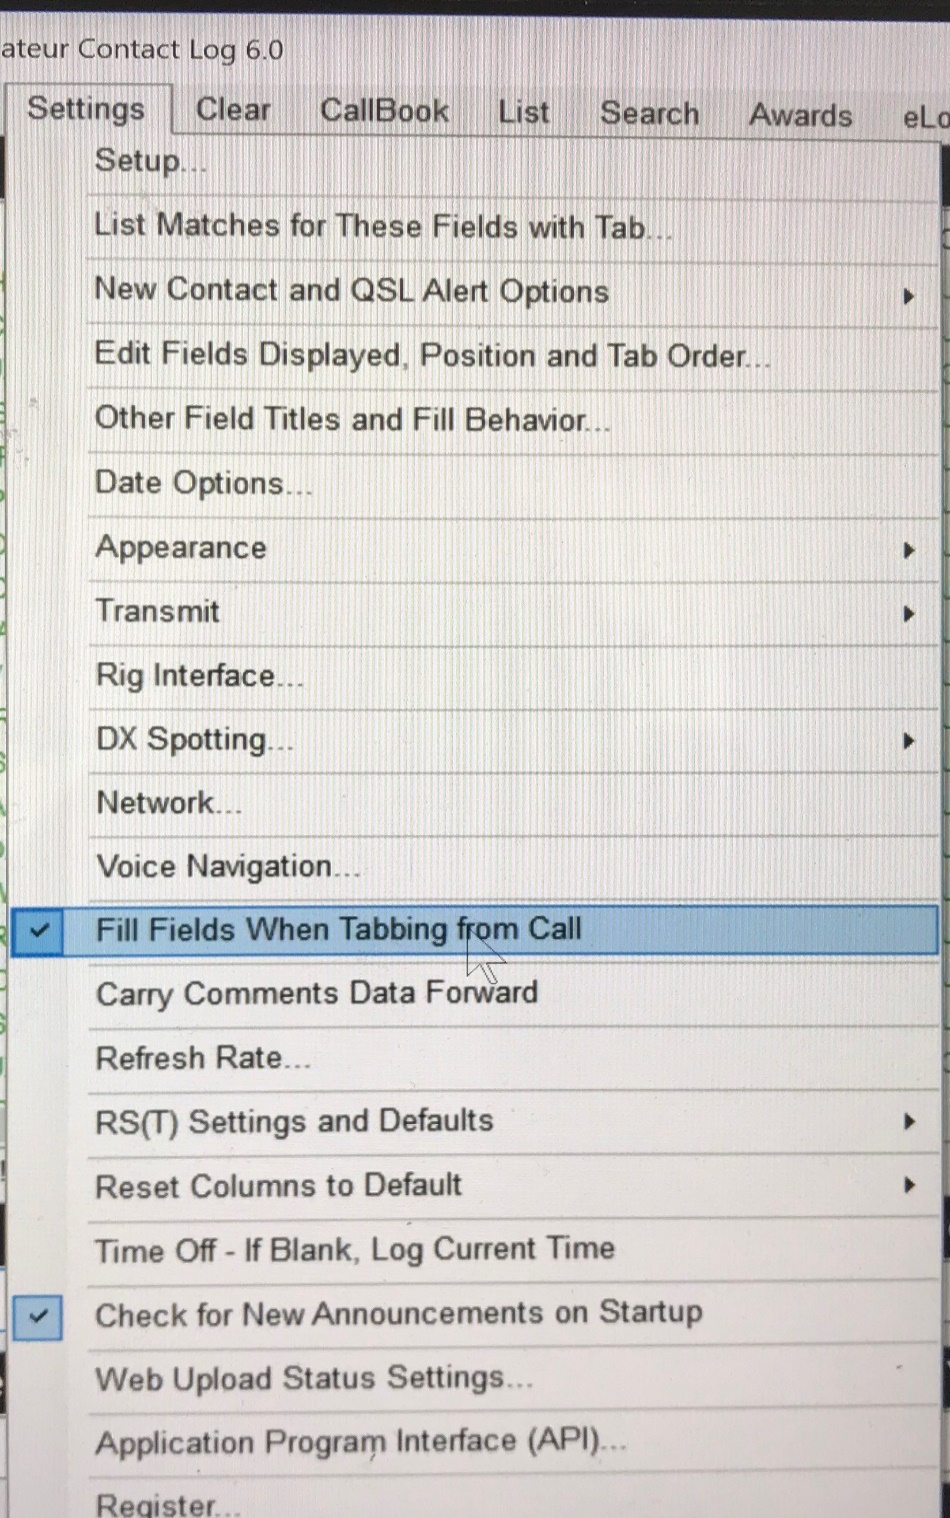 Figure 5
Now do a few test entries and see how it all works. You can continue to experiment with various modifications and adjustments to suit your personal needs.